MOGUL CONSTRUCTION @ The ABOM Mogul challenge
|
ESSENTIAL INGREDIENTS
An Idea: sketch out to dream requirements A grooming department willing to build the impossible As much clean snow as possible 1 x winch cat 3 x grooming cats 60 Hours of build time Team Buller (Vital) to step, shape and shovel (must be available 24Hrs) 20 Volunteers to chop, slip and ice on comp day Spook (vital) for transport Stereo system (LOUD) Race department equipped with: Timing equipment 20 Red and 20 Blue slalom gates Start gates Time Requirement: 144 hours, per person over 6 days, to build the impossible Outcome: ABOM MOGUL CHALLENGE, Summit course |
|
THE SUMMIT COURSE: 2005-2008
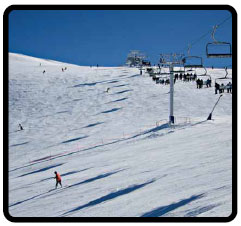
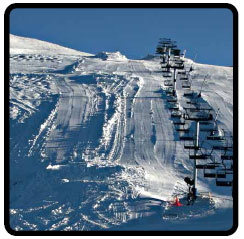
The idea: A mogul course that incorporated moguls and freeride. 4 Line mogul course Built close to FIS specifications, with a ‘big air’ replacing the bottom jumps and last bumps. STEP 1: Sourcing the site The Summit was decided upon for its pitch and incredible exposure. 13 years earlier, the 5th ABOM mogul challenge was run in a similar location and over the years, Team Buller’s best used to train in the same spot, impressing all on the Summit chairlift. Given the location, we needed to consult every weather forecast we could get our hands on. No point spending 5 days building a course when rain, snow or fog could eventuate! |
|
STEP 2:
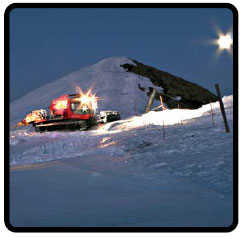
The track build Without the grooming department, the course would not exist. Up to 30 hours will be spent, pulling and pushing snow in to make a perfectly level track, with 3 mounds that will eventually become the start, top jump and bottom air. The track needs be 21m wide and at least 1.5m deep. A winch cat attached to a anchor at the top of the Summit (to do the heavy lifting, up steep hills) and 3 free kassbohrers, coordinating and continually assessing where there needs to be more snow. STEP 3: Marking out the course The course is sketched out on paper to get an idea of dimensions. A mogul lines needs to be straight, especially in a dual competition, where any deviation from a straight line could give your competitor an advantage. |
The edge marker is a row of conduit, set 7m from the lift line, from the top of the track to the bottom. Once this is as straight as possible, a further 2m is measured to provide a buffer between the first line of moguls and the fence: vital for safety!
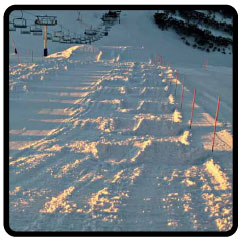
Conduit is then set to mark the location for the moguls. The conduit is set between 6.5 to 7m apart, providing a visual indication to the cat drivers of where the moguls need to be pushed.
21m is approximately the width of 3 cats: 1 width for the 2 left lines, a full cat width in the middle and 1 width for the 2 right lines.
|
STEP 4:
Finalizing the jumps The bottom air takes up to 20 hours to create. Just when you think you have enough snow, you will always need more. Given the natural terrain deviation, an enormous amount of snow needs to be pushed into the bottom air, to ensure that it is level across all courses. The hardest part is to get the landing steep enough, long enough and not skewed to the skiers right. Once the tables are completed, the jumps are set. These needs to be in place before the moguls are build, as the cats require room to move, a luxury they lose when the bumps are set. World Cup skiers and young children compete side by side on this course, therefore the jumps needs to cater for all levels. Even more snow is sourced to push in the take-offs. The jumps are built to design height by the cats and shaped by hand, to ensure correct kick. |
|
STEP 5:
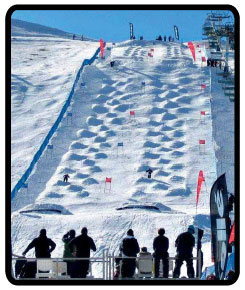
Bump build The bottom bumps are built by the winch cat. A full blade of snow is pushed up the hill, to sit beside the conduit that marks 7m distances apart. The Cat will then plow down half of this blade of snow and push up another half blade of snow to exactly half way between the first row. This is how machine-made bumps are created. The Top section of moguls is created top down by a free cat (versus bottom up by the winch below). It is vital that these lines meet up after the top air, which is difficult, as the top jump blocks all sight of the bottom lines. The line of conduit down the side facilitates this, as does marker poles in the top air, that mark the centre of the line of the bottom bumps. We are left with 6 rows of roughly 120 snow piles, which need to be stepped and shovelled out, to make a round, ski-able bump. The Team Buller crews step as soon as possible after the bumps have been built. It’s easier to step soft snow than aggravated snow that has set overnight, although this sometimes means stepping in the middle of the night (3am) or at sunrise. STEP 6:
The final product Once the bumps have been stepped and skied in, the jumps shaped and the landing chopped, the only thing left to do is fence it. Race club erect the blue fence, place timing at the bottom and set safety fences beside the jumps and at the bottom of the course. Red and Blue race flags are set up down the outside of the course, red on the right and blue on the left. The course is slipped, the jumps iced to ensure they remain intact when the sun beats down on them, the stereo system belts out the tunes and 60 hours of course preparation result in an incredible day of competition. By Nicole Lewis. Team Buller - Course Coordinator. All Photos: Nicole Lewis |

